はじめに
以前御紹介した PINE A64+
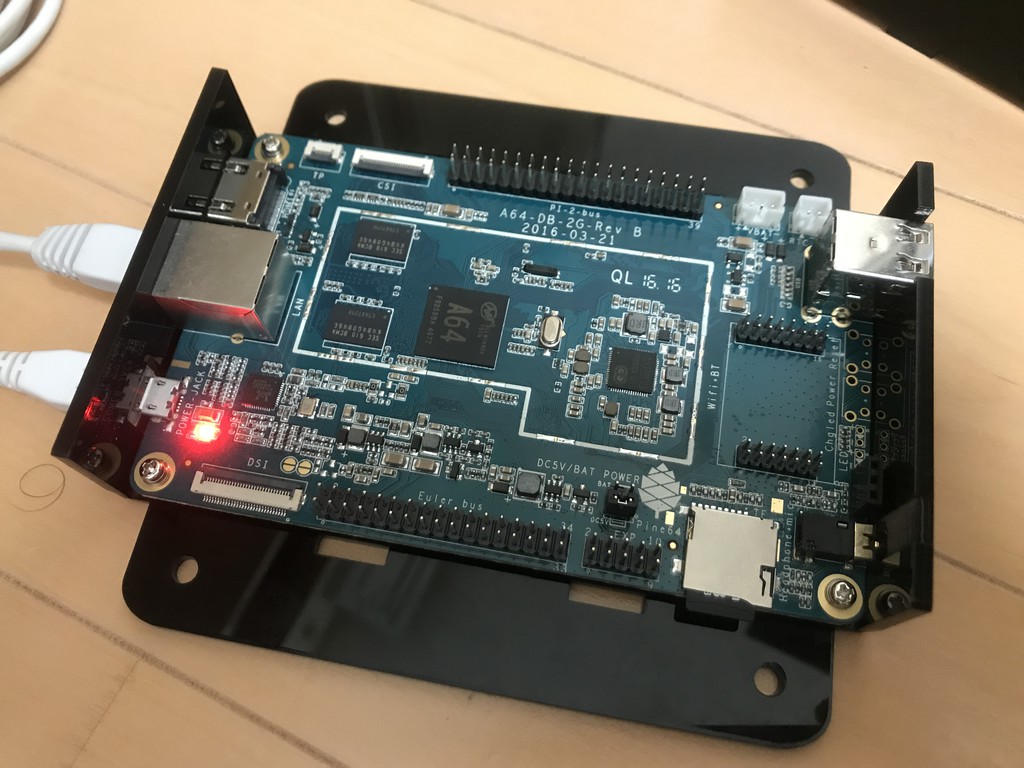
ですが,標準的なインストールイメージだと,5回に2回程度は再起動に失敗してしまいます.何回か電源を入れ直せば起動するので,これまでだましだまし使ってきたのですが,色々見てると DietPi の出来が良いとのことで導入してみた備忘録です.
なお,確かに DietPi だと再起動に失敗はしませんが,
初期状態だと HDMI 経由では何にも映りません.
私の用途だと,Headless 運用なので,気にはなりませんし,映るように設定を変更してもいないことに御注意下さい.
SDカードへのイメージの書き込み
DietPi の元ページは以下の通り.
ダウンロードから所有している SBC を選んで(今回は Pine A64 用の「DietPi_PineA64-ARMv8-Stretch.7z」)ダウンロードします.Debian の Stretch ベースみたいですね.
7z 圧縮なので,7-zip 辺りを使って展開すると,OS のイメージ「DietPi_v6.14_PineA64-ARMv8-Stretch.bin」が出てきます.これを前回と同様 Ether を使って書き込みます.なお,Etcher の元ページは以下の通りです.

初期設定
ヘッドレスでの導入となります.初期設定は,SDカードのFAT32でフォーマットされたパーティションにある dietpi.txt で行います.今回は
- 有線LANに適当な固定アドレスとゲートウェイ,DNSサーバーを設定
のみを実施しました(以下の Enter your Static Network details below, if applicable 部分を参照).内容は以下の通りです.設定できる項目がコメントで記述されています.
#Modifications to /boot/* files, will not be saved when powered on.
#Please ensure you edit from the DietPi-RamDisk location /DietPi/*

#NB: This is intended for advanced users, unless you know what you are doing, do not edit this file. Please use the DietPi programs instead.
#NB: Do not remove uncommented lines, as the items are scraped by DietPi programs, on demand.

#------------------------------------------------------------------------------------------------------
# DietPi-Automation
# All settings below will be applied on the 1st boot of DietPi, ONCE.
#------------------------------------------------------------------------------------------------------

##### Networking Options #####

#	If both Ethernet and Wifi are enabled, Wifi will take priority and Ethernet will be disabled.
#		1=enabled
AUTO_SETUP_NET_ETHERNET_ENABLED=1
AUTO_SETUP_NET_WIFI_ENABLED=0

#	Enter your Wifi details below, if applicable (Case Sensitive).
AUTO_SETUP_NET_WIFI_SSID=MySuperDooperWiFi
AUTO_SETUP_NET_WIFI_KEY=0123456789
#	available | WPA-PSK / WPA-EAP / NONE | WEP=No longer supported
AUTO_SETUP_NET_WIFI_KEYMGR=WPA-PSK

#  For WPA2 Enterprise uncomment the following entries and set accordingly
#AUTO_SETUP_NET_WIFI_PROTO=RSN
#AUTO_SETUP_NET_WIFI_PAIRWISE=CCMP
#AUTO_SETUP_NET_WIFI_AUTH_ALG=OPEN
#AUTO_SETUP_NET_WIFI_EAP=PEAP
#AUTO_SETUP_NET_WIFI_IDENTITY=<userid>
#AUTO_SETUP_NET_WIFI_PASSWORD=<userpassword>
#
# If your WPA2 Enterprise requries a certificate copy the cert to this /boot directory and enter the name on the following line
#AUTO_SETUP_NET_WIFI_CERT=wpa2ent_cert.cer
# Uncomment either or both lines below and set accordingly for your WPA2 Enterprise needs.
#AUTO_SETUP_NET_WIFI_PHASE1=
#AUTO_SETUP_NET_WIFI_PHASE2=auth=MSCHAPV2

#	Enter your Static Network details below, if applicable.
AUTO_SETUP_NET_USESTATIC=1
AUTO_SETUP_NET_STATIC_IP=192.168.0.100
AUTO_SETUP_NET_STATIC_MASK=255.255.255.0
AUTO_SETUP_NET_STATIC_GATEWAY=192.168.0.1
AUTO_SETUP_NET_STATIC_DNS=192.168.0.1

#	Hostname
AUTO_SETUP_NET_HOSTNAME=pa64

#	Force ethernet speeds
#		NB: This is mainly aimed towards Pine A64's which may have a HW issue that causes unstable 1Gbit link.
#		0=automatic speed | 10 = 10mbit, 100 = 100mbit etc
AUTO_SETUP_NET_ETH_FORCE_SPEED=0

##### Misc Options #####

#	Size of swapfile to generate (MB)
#		0=Disabled | 1=auto (2GB-RAM = size) | 2+=manual
AUTO_SETUP_SWAPFILE_SIZE=1
#		Optional swapfile location
AUTO_SETUP_SWAPFILE_LOCATION=/var/swap

# Unmask (enable) systemd-logind service, which is masked by default on DietPi
AUTO_UNMASK_LOGIND=0

##### Software Automation Options #####

#	Fully automate installation
#		1=Automated installation with no user inputs.
#		It is HIGHLY recommended to also set CONFIG_BOOT_WAIT_FOR_NETWORK=2, to force infinite wait for network connection during boot, preventing no connection errors due to timeout.
AUTO_SETUP_AUTOMATED=0

#	Global Password to be applied for the system
#		Requires AUTO_SETUP_AUTOMATED=1
#		Affects user "root" and "dietpi" login passwords, and, all software installed by dietpi-software, that requires a password
#		eg: MySQL, Transmission, Deluge etc.
#		WARN: Passwords with the any of the following characters are not supported: \"$
#		WARN: Do NOT change this entry after 1st run setup of DietPi has been completed. It is always scraped by dietpi-software.
AUTO_SETUP_GLOBAL_PASSWORD=dietpi

#	DietPi-Software to automatically install. | requires AUTO_SETUP_AUTOMATED=1
#	For a list of software index's (ID's), run '/DietPi/dietpi/dietpi-software list'
#	No limit on number entries, add as many as you need and uncomment the line.
#	DietPi will automatically install all pre-reqs (eg: ALSA/XSERVER for desktops etc)
#	- Examples:
#AUTO_SETUP_INSTALL_SOFTWARE_ID=23	#will install Desktop LXDE
#AUTO_SETUP_INSTALL_SOFTWARE_ID=74	#will install LAMP webserver stack
#AUTO_SETUP_INSTALL_SOFTWARE_ID=44	#will install Bittorrent transmission

#	DietPi-Software Choice System
#	SSH Server Selection:
#		0=none
#		-1=dropbear
#		-2=opensshserver
AUTO_SETUP_SSH_SERVER_INDEX=-1

#	File Server Selection:
#		0=none/manual
#		-1=proftp
#		-2=samba
AUTO_SETUP_FILE_SERVER_INDEX=0

#	Logging Mode Selection:
#		0=none/manual
#		-1=ramlog 1h clear
#		-2=ramlog 1h save clear
#		-3=logrotate + rsyslog
AUTO_SETUP_LOGGING_INDEX=-1
#	RAMlog max tmpfs size (MB). 50MB should be fine for single use. 200MB+ for heavy webserver and access log use etc.
AUTO_SETUP_RAMLOG_MAXSIZE=50

#	Webserver Preference Selection:
#	NB: This will get ignored, if you have manually selected any WEBSERVER_Stack.
#		0=Apache2
#		-1=Nginx
#		-2=Lighttpd
AUTO_SETUP_WEB_SERVER_INDEX=-2

#	DietPi-Autostart | Requires AUTO_SETUP_AUTOMATED=1
#	After installation is completed, which program should the system boot to?
#		0=Console 7=Console+auto root login | 1=Kodi 2=Desktops (LXDE/MATE etc) 5=DietPi-Cloudshell 6=Uae4ARM (Fastboot) 8=Uae4ARM (standard boot) 9=dxx-rebirth
AUTO_SETUP_AUTOSTART_TARGET_INDEX=0

#	Language/Regional settings | Requires AUTO_SETUP_AUTOMATED=1
#		Timezone eg: Europe/London America/New_York | Full list (TZ*): https://en.wikipedia.org/wiki/List_of_tz_database_time_zones
AUTO_SETUP_TIMEZONE=Europe/London
#		Locale eg: en_GB.UTF-8 / en_US.UTF-8 etc. One entry ONLY.
AUTO_SETUP_LOCALE=en_GB.UTF-8
#		Keyboard Layout eg: gb us de fr
AUTO_SETUP_KEYBOARD_LAYOUT=gb

#	Custom Script (pre-networking and pre-DietPi install) | Runs before DietPi installation and networking
#		Allows you to automatically execute a custom script before networking and DietPi installation is started
#		Option 1 = Copy your script to /boot/Automation_Custom_PreScript.sh and it will be executed automatically.
#		NB: Executed script log /var/tmp/dietpi/logs/dietpi-automation_custom_prescript.log

#	Custom Script (post-networking and post-DietPi install) | Runs after DietPi installation is completed
#		Allows you to automatically execute a custom script at the end of DietPi installation.
#		Option 1 = Copy your script to /boot/Automation_Custom_Script.sh and it will be executed automatically.
#		Option 2 = Host your script online, then use AUTO_SETUP_CUSTOM_SCRIPT_EXEC=http://myweb.com/myscript.sh , it will be downloaded and executed automatically. | 0=disabled
#		NB: Executed script log /var/tmp/dietpi/logs/dietpi-automation_custom_script.log
AUTO_SETUP_CUSTOM_SCRIPT_EXEC=0

#------------------------------------------------------------------------------------------------------
# D I E T - P I
# DietPi-Config settings.
#------------------------------------------------------------------------------------------------------
#RPi Hdmi output (if 0, sets tvservice -o and framebuffer 16x 16y 8z on boot, headless)
CONFIG_HDMI_OUTPUT=1

#Cpu Governor | ondemand | powersave | performance | conservative
CONFIG_CPU_GOVERNOR=ondemand
CONFIG_CPU_USAGE_THROTTLE_UP=50

#CPU Frequency Limits
#	NB: Intel CPU's use a percentage value (%) from 0-100 (eg: 55)
#	NB: All other devices must use a specific MHz value (eg: 1600)
#	Limit the MAX cpu frequency for all cores | Disabled=disabled
CONFIG_CPU_MAX_FREQ=Disabled
#	Limit the MIN cpu frequency for all cores | Disabled=disabled
CONFIG_CPU_MIN_FREQ=Disabled

#	Disable Intel based turbo/boost stepping. This flag should not be required, setting <100% MAX frequency should disable Turbo on Intel CPU's.
CONFIG_CPU_DISABLE_TURBO=0

#Min value 10000 microseconds (10ms)
CONFIG_CPU_ONDEMAND_SAMPLE_RATE=25000

#sampling rate * down factor / 1000 = Milliseconds (40 = 1000ms when sampling rate is 25000)
CONFIG_CPU_ONDEMAND_SAMPLE_DOWNFACTOR=80

#Proxy settings | System-wide proxy settings. Use dietpi-config > networking options to apply.
#	NB: Do not modify, you must use dietpi-config to configure/set options
CONFIG_PROXY_ENABLED=0
CONFIG_PROXY_ADDRESS=MyProxyServer.com
CONFIG_PROXY_PORT=8080
CONFIG_PROXY_USERNAME=
CONFIG_PROXY_PASSWORD=

#Delay boot until network is established: 0=disabled | 1=10 second wait max (default) | 2=infinite wait
CONFIG_BOOT_WAIT_FOR_NETWORK=1

#DietPi check for updates (allows dietpi to check for updates on a daily basis and boot using a <1kb file download.)
CONFIG_CHECK_DIETPI_UPDATES=1

#NTPD Update Mode: 0=disabled | 1=boot only | 2=boot + daily | 3=boot + hourly | 4=Daemon + Drift
CONFIG_NTP_MODE=2

#WiFi country code. 2 character value (eg GB US DE JP): https://en.wikipedia.org/wiki/ISO_3166-1_alpha-2
CONFIG_WIFI_COUNTRY_CODE=GB

#Serial Console: Set to 1 if you require a serial console.
#	NB: Serial console is always enabled by default for 1st run setup, then disabled afterwards, unless set below.
#	NB: must be ENABLED for the following boards: Odroid XU4/HC1/HC2, RockPro64
CONFIG_SERIAL_CONSOLE_ENABLE=0

#Soundcard
CONFIG_SOUNDCARD=none

#LCD Panel addon
#	NB: Do not modify, you must use dietpi-config to configure/set options
CONFIG_LCDPANEL=none

#Prefer IPversion (for: APT, wget) | auto (let system decide) / ipv4 (force) / ipv6 (prefer) | eg: force IPv4 with CONFIG_PREFER_IPVERSION=ipv4
CONFIG_PREFER_IPVERSION=ipv4

#Apt mirrors which are applied to /etc/apt/sources.list | Values here will also be applied during 1st run setup
#	Raspbian = https://www.raspbian.org/RaspbianMirrors
#	Debian = https://www.debian.org/mirror/official#list
CONFIG_APT_RASPBIAN_MIRROR=http://raspbian.raspberrypi.org/raspbian
CONFIG_APT_DEBIAN_MIRROR=https://deb.debian.org/debian/

#NTPD mirror, applied to /etc/ntp.conf
#	For a full list, please see http://www.pool.ntp.org
#	Please remove the initial interger and full stop from the value (removing 0.). eg: debian.pool.ntp.org
CONFIG_NTP_MIRROR=debian.pool.ntp.org

#------------------------------------------------------------------------------------------------------
# D I E T - P I
# DietPi-Software settings.
#------------------------------------------------------------------------------------------------------
#Enter your EmonCMS.org write API key here. It will be applied automatically during EmonPi/Hub installation.
#	eg: SOFTWARE_EMONHUB_APIKEY=b4dfmk2o203mmxx93a
SOFTWARE_EMONHUB_APIKEY=

#VNC Server Options
SOFTWARE_VNCSERVER_WIDTH=1280
SOFTWARE_VNCSERVER_HEIGHT=720
SOFTWARE_VNCSERVER_DEPTH=16
SOFTWARE_VNCSERVER_DISPLAY_INDEX=1
SOFTWARE_VNCSERVER_SHARE_DESKTOP=0

#Optional username for ownCloud/Nextcloud admin account, default is 'admin'. Applied during installation.
SOFTWARE_OWNCLOUD_NEXTCLOUD_USERNAME=admin

#Optional data directory for ownCloud, default is '/mnt/dietpi_userdata/owncloud_data'. Applied during installation.
#	This option is for advanced users. For full compatibility, please keep this options defaults, and, use dietpi-drive_manager to move the DietPi user data location.
SOFTWARE_OWNCLOUD_DATADIR=/mnt/dietpi_userdata/owncloud_data

#Optional data directory for Nextcloud, default is '/mnt/dietpi_userdata/nextcloud_data'. Applied during installation.
#	This option is for advanced users. For full compatibility, please keep this options defaults, and, use dietpi-drive_manager to move the DietPi user data location.
SOFTWARE_NEXTCLOUD_DATADIR=/mnt/dietpi_userdata/nextcloud_data

#Wifi Hotspot
SOFTWARE_WIFI_HOTSPOT_SSID=DietPi-HotSpot
#	minimum of 8 characters
SOFTWARE_WIFI_HOTSPOT_KEY=dietpihotspot
SOFTWARE_WIFI_HOTSPOT_CHANNEL=3

#------------------------------------------------------------------------------------------------------
# D I E T - P I
# Dev settings
#------------------------------------------------------------------------------------------------------
DEV_GITBRANCH=master
DEV_GITOWNER=Fourdee
初回起動
SDカードを Pine A64+ に挿入し,Ethernet ケーブルを接続し,電気を入れると,30秒くらいで,ネットワークの口のLEDが点滅を始めます.この状態で,適当な端末から,ssh で,
$ ssh -l root 192.168.0.100

The authenticity of host '192.168.0.100 (192.168.0.100)' can't be established.
ECDSA key fingerprint is SHA256:xh3k+Q6axIIyayOxxxR58XXRGkgdxxsVmNxghtxjY3l6Q.
Are you sure you want to continue connecting (yes/no)? yes

Warning: Permanently added '192.168.0.100' (ECDSA) to the list of known hosts.
[email protected]'s password: dietpi
のように接続します(要するに初期IDとパスワードは,root/dietpi).すると,ライセンスに関する画面が表示され,<OK> を選んだ後,
┌────────────────────────┤ DietPi-Set_software ├─────────────────────────┐
   │                                                                        │
   │ Do you want to adjust the default global password for DietPi-Software  │
   │ installations and new unix users? We especially recommend to change    │
   │ the default password "dietpi". This does not effect any existing unix  │
   │ user login.                                                            │
   │                                                                        │
   │ NB: This password will be saved as plain text within                   │
   │ /DietPi/dietpi.txt to be useable by DietPi scripts for e.g. web        │
   │ application and database logins. We highly recommand to adjust all     │
   │ passwords for web services and new unix users independently            │
   │                                                                        │
   │                   <Ok>                       <Cancel>                  │
   │                                                                        │
   └────────────────────────────────────────────────────────────────────────
の様な「Dietpi-Software installations」と「新規ユーザー」のための初期パスワードである「DietPi」を変更するか否かの選択画面が出てきます.ただし,注意点として,
ここで設定するパスワードは /DietPi/dietpi.txt に暗号化なしで保存されるので,WEBサービス用のパスワードなどとは違うものにせよ!
とのこと.とりあえずここは,<Cancel> を選びました.すると今度は,
┌────────────────────────┤ DietPi-Set_software ├─────────────────────────┐
   │                                                                        │
   │ Change unix user passwords?                                            │
   │                                                                        │
   │ DietPi has two accounts by default "root" and "dietpi". On first boot, │
   │ both share the global password "dietpi", respectively the one set in   │
   │ dietpi.txt.                                                            │
   │                                                                        │
   │ It is highly recommended to change this password, ideally, it should   │
   │ be different than the global DietPi-Software password.                 │
   │                                                                        │
   │ Would you like to change the login passwords for "root" and "dietpi"?  │
   │                                                                        │
   │                   <Ok>                       <Cancel>                  │
   │                                                                        │
   └────────────────────────────────────────────────────────────────────────┘
初期設定で作られるユーザーである root と dietpi のパスワードを「dietpi」以外にするかどうか尋ねられます.これはこの時点で変えた方が良いのだと思いますが,とりあえずここも <Cancel> を選んで後回しにしました.
するとアップデート等の作業が行われたのち,
┌───────────────────────────┤ DietPi-Survey ├────────────────────────────┐
   │ DietPi-Survey would like to collect anonymous statistics about your    │
   │ hardware, DietPi software and settings. This allows us to focus        │
   │ development based on popularity. NO private data will be collected and │
   │ NO ONE can identify you based on the data. The data is sent via        │
   │ secured connection to our SFTP server and is stored there unreadable   │
   │ to the public upload user. If you agree, your uploaded data will be    │
   │ automatically updated on every DietPi-Update and DietPi-Software       │
   │ usage. The current survey statistics can be reviewed at:               │
   │ https://dietpi.com/survey                                              │
   │                                                                        │
   │ Your personal upload file would look like this:                        │
   │ #!/bin/bash                                                            │
   │ # -------------------------                                            │
   │ ((aSURVEY_VERSION[6]++))                                               │
   │ # -------------------------                                            │
   │ ((aSURVEY_SENTCOUNT[1]++))                                             │
   │ ((aDIETPI_VERSION[6.16]++))                                            │
   │ ((aDEVICE_NAME[Pine A64 (aarch64)]++))                                 │
   │ ((aCPU_ARCH[aarch64]++))                                               │
   │ ((aCPU_COUNT[4]++))                                                    │
   │ ((aDISTRO_VERSION[stretch]++))                                         │
   │ ((aAUTOSTART_OPTION[${aAUTOSTART_NAME[0]}]++))                         │
   │ ((aAUTO_SETUP_AUTOMATED[0]++))                                         │
   │ ((aNETWORK_INTERFACE[eth0]++))                                         │
   │ # -------------------------                                            │
   │ # DietPi-Software Installed                                            │
   │ # -------------------------                                            │
   │                                                                        │
   │              1 Opt IN to DietPi-Survey.                                │
   │              0 Opt OUT and purge my existing survey data.              │
   │                                                                        │
   │                                                                        │
   │                   <Ok>                       <Cancel>                  │
   │                                                                        │
   └────────────────────────────────────────────────────────────────────────┘
ハードウェアとか設定とかの統計情報を dietpi.com に送るかどうかの選択画面が出てきます.現状は,
を見れば分かるらしい.まぁタダで使わせてもらってるのだから今回は協力するを選んで次に進みます.少し待つと,
┌──────────────────────────┤ DietPi-Software ├───────────────────────────┐
   │                                                                        │
   │ DietPi has been updated to the latest version.                         │
   │                                                                        │
   │ The system will now reboot. Once completed, simply login to resume     │
   │ DietPi Setup.                                                          │
   │                                                                        │
   │ Press Enter to Continue.                                               │
   │                                                                        │
   │                                 <Ok>                                   │
   │                                                                        │
   └────────────────────────────────────────────────────────────────────────┘
のように再起動を促されます.再起動後設定の続きが行われる旨の記述があることに注意する必要があります.
再起動(1回目)
再起動できたころを見計らって,ssh で接続しに行くと,key が違うというエラーが表示されてしまいました.どうも初回起動時に ssh のキーを作り直しているっぽい.仕方がないので,
$ ssh-keygen -R 192.168.0.100
$ ssh -l root 192.168.0.100
のように前のキーを決してから接続すると,再びライセンス同意画面が表示された後,
┌──────────────────────────┤ DietPi-Software ├───────────────────────────┐
   │                                                                        │
   │ Help!                Links to online guides, docs and information      │
   │ DietPi-Config        Feature-rich configuration tool for your device   │
   │                      ●─ Select Software ─────────────────────────────● │
   │ Search               Find a software title for installation            │
   │ Software Optimized   Select DietPi optimized software for installation │
   │ Software Additional  Select additional Linux software for installation │
   │ SSH Server           : Dropbear                                        │
   │ File Server          : None                                            │
   │ Log System           : DietPi-Ramlog #1                                │
   │ Webserver Preference : Lighttpd                                        │
   │ User Data Location   : SD/EMMC | /mnt/dietpi_userdata                  │
   │                      ●─ Install or Remove Software ──────────────────● │
   │ Uninstall            Select installed software for removal             │
   │ Install              Go >> Start installation for selected software    │
   │                                                                        │
   │                                                                        │
   │                   <Ok>                       <Exit>                    │
   │                                                                        │
   └────────────────────────────────────────────────────────────────────────┘
のような設定メニューが出てきます.ここで,DietPi-Config を選ぶと,
┌───────────────────────────┤ DietPi-Config ├────────────────────────────┐
   │ Hardware : Pine A64 (aarch64)                                          │
   │                                                                        │
   │                      1  Display Options                                │
   │                      2  Audio Options                                  │
   │                      3  Performance Options                            │
   │                      4  Advanced Options                               │
   │                      5  Language/Regional Options                      │
   │                      6  Security Options                               │
   │                      7  Network Options: Adapters                      │
   │                      8  Network Options: Misc                          │
   │                      9  AutoStart Options                              │
   │                      10 Tools                                          │
   │                                                                        │
   │                                                                        │
   │                   <Ok>                       <Exit>                    │
   │                                                                        │
   └────────────────────────────────────────────────────────────────────────┘
の様なメニューが出てくるので,今回は最低限の項目として,
-
5 Language/Regional Options → Locale → ja_JP.UTF-8
-
5 Language/Regional Options → TimeZone → Asia/Tokyo
- 6 Security Options → 2 Change hostname → 適当なhostname
を選ぶと,再び再起動を求められました.
再起動(2回目)
再接続して設定を続けます.
現れるメニューから Software Optimized を見ると,デスクトップ環境だ何だと色々インストールできるみたいですが,今回は見送り,Install を選ぶと,
┌──────────────────────────┤ DietPi-Software ├───────────────────────────┐
   │                                                                        │
   │ DietPi was unable to detect any additional software selections for     │
   │ install.                                                               │
   │                                                                        │
   │ NB: You can use dietpi-software at a later date, to install optimized  │
   │ software from our catalogue as required.                               │
   │                                                                        │
   │ Do you wish to continue with DietPi as a pure minimal image?           │
   │                                                                        │
   │                   <Ok>                       <Cancel>                  │
   │                                                                        │
   └────────────────────────────────────────────────────────────────────────┘
の様に最小セットアップで良いかどうか尋ねる画面が出てきます.<OK> を選ぶと,またまた再起動します.
再起動(3回目)
再び再起動し,接続してみると,
 ───────────────────────────────────────
 DietPi     | 15:15 | Sun 14/10/18
 ───────────────────────────────────────
 v6.16      | Pine A64 (aarch64)
 ───────────────────────────────────────
 eth0       | 192.168.0.100
 ───────────────────────────────────────
 DietPi Team     : Daniel Knight (founder), MichaIng, K-Plan
 Image           : DietPi Core Team (pre-image: Ayufan)
 Web             : https://DietPi.com | https://twitter.com/dietpi_
 Patreon Legends : PINE64 community
 Donate          : https://DietPi.com/#donate
 DietPi Hosting  : Powered by https://MyVirtualServer.com

 dietpi-launcher  = All the DietPi programs in one place.
 dietpi-config    = Feature rich configuration tool for your device.
 dietpi-software  = Select optimized software for installation.
 htop             = Resource monitor.
 cpu              = Shows CPU information and stats.

root@pa64:~#
の様に表示されて,どうもこれでインストール完了のようです.
なお,dietpi-launcher を起動してみると,
┌──────────────────────────┤ DietPi-Launcher ├───────────────────────────┐
   │ Please select a program to run:                                        │
   │                                                                        │
   │                      ●─ Install Optimized Software ───────────────────●│
   │ DietPi-Software      Install optimized software thats ready to run.    │
   │                      ●─ Configuration ────────────────────────────────●│
   │ DietPi-Config        Feature rich config tool for your device.         │
   │ DietPi-AutoStart     Choose what software runs after boot.             │
   │ DietPi-Cron          Modify the start times of cron jobs.              │
   │ DietPi-Process_Tool  Tweak Nice, Affinity, Schedulers for programs.    │
   │ DietPi-Drive_Manager Setup and control multiple external drives.       │
   │                      ●─ DietPi Updates ───────────────────────────────●│
   │ DietPi-Update        Keep your DietPi system upto date.                │
   │                      ●─ Backups / Sync ───────────────────────────────●│
   │ DietPi-Backup        Backup and restore your DietPi system.            │
   │ DietPi-Sync          Duplicate (Sync) one directory to another.        │
   │                      ●─ Maintenance ──────────────────────────────────●│
   │ DietPi-Explorer      File explorer and manager.                        │
   │ DietPi-Cleaner       Remove unwanted junk from your system.            │
   │                      ●─ Misc ─────────────────────────────────────────●│
   │ DietPi-CpuInfo       Displays CPU Temp, frequencies, type etc.         │
   │ DietPi-LetsEncrypt   Frontend for Lets Encrypt, free SSL certs         │
   │ DietPi-Survey        Join or leave our usage program, view upload file.│
   │ DietPi-BugReport     Found a bug? Let us know!                         │
   │ DietPi-MorseCode     Converts and outputs a text file to morsecode.    │
   │                                                                        │
   │                                                                        │
   │                   <Ok>                       <Exit>                    │
   │                                                                        │
   └────────────────────────────────────────────────────────────────────────┘
の様にソフトのインストールとかバックアップとか色々できるようになっています.ソフトのインストールを行う
- DietPi-Software
を選ぶと,再起動(1回目)で使ったメニューが出てきます.また,ファイルシステムは
# mount
/dev/mmcblk0p2 on / type ext4 (rw,noatime,stripe=1024,data=ordered)
devtmpfs on /dev type devtmpfs (rw,relatime,size=815492k,nr_inodes=203873,mode=755)
sysfs on /sys type sysfs (rw,nosuid,nodev,noexec,relatime)
proc on /proc type proc (rw,relatime)
securityfs on /sys/kernel/security type securityfs (rw,nosuid,nodev,noexec,relatime)
tmpfs on /dev/shm type tmpfs (rw,nosuid,nodev)
devpts on /dev/pts type devpts (rw,nosuid,noexec,relatime,gid=5,mode=620,ptmxmode=000)
tmpfs on /run type tmpfs (rw,nosuid,nodev,mode=755)
tmpfs on /run/lock type tmpfs (rw,nosuid,nodev,noexec,relatime,size=5120k)
tmpfs on /sys/fs/cgroup type tmpfs (ro,nosuid,nodev,noexec,mode=755)
cgroup on /sys/fs/cgroup/systemd type cgroup (rw,nosuid,nodev,noexec,relatime,xattr,release_agent=/lib/systemd/systemd-cgroups-agent,name=systemd)
cgroup on /sys/fs/cgroup/perf_event type cgroup (rw,nosuid,nodev,noexec,relatime,perf_event)
cgroup on /sys/fs/cgroup/cpu,cpuacct type cgroup (rw,nosuid,nodev,noexec,relatime,cpuacct,cpu)
cgroup on /sys/fs/cgroup/devices type cgroup (rw,nosuid,nodev,noexec,relatime,devices)
cgroup on /sys/fs/cgroup/cpuset type cgroup (rw,nosuid,nodev,noexec,relatime,cpuset)
cgroup on /sys/fs/cgroup/blkio type cgroup (rw,nosuid,nodev,noexec,relatime,blkio)
cgroup on /sys/fs/cgroup/hugetlb type cgroup (rw,nosuid,nodev,noexec,relatime,hugetlb)
cgroup on /sys/fs/cgroup/freezer type cgroup (rw,nosuid,nodev,noexec,relatime,freezer)
cgroup on /sys/fs/cgroup/memory type cgroup (rw,nosuid,nodev,noexec,relatime,memory)
systemd-1 on /boot type autofs (rw,relatime,fd=27,pgrp=1,timeout=0,minproto=5,maxproto=5,direct)
debugfs on /sys/kernel/debug type debugfs (rw,relatime)
mqueue on /dev/mqueue type mqueue (rw,relatime)
hugetlbfs on /dev/hugepages type hugetlbfs (rw,relatime)
systemd-1 on /proc/sys/fs/binfmt_misc type autofs (rw,relatime,fd=36,pgrp=1,timeout=0,minproto=5,maxproto=5,direct)
configfs on /sys/kernel/config type configfs (rw,relatime)
fusectl on /sys/fs/fuse/connections type fusectl (rw,relatime)
tmpfs on /DietPi type tmpfs (rw,nosuid,nodev,noatime,size=10240k)
tmpfs on /tmp type tmpfs (rw,nosuid,nodev,noatime,size=1047552k)
tmpfs on /var/log type tmpfs (rw,nosuid,nodev,noatime,size=51200k)
/dev/mmcblk0p1 on /boot type vfat (rw,noatime,fmask=0022,dmask=0022,codepage=437,iocharset=iso8859-1,shortname=mixed,errors=remount-ro)
の様になっています./tmp とか /var/log とかは tmpfs 扱い(一時ファイル扱い)となっているんですね.
おわりに
DietPi,CentOS とか Ubuntu とかとはかなり感覚が違いますが,これはこれで非常に良く出来ています.GUI ではなく,CUI でよくここまで作り込んでるなぁ……と感心しました.
入れてしまえば Debian なので,DietPi のパッケージに無いものは,apt で普通に入ります.また,初めからきちんと SBC であることが考慮され,さらに,監視系のコマンドやお掃除系のコマンドもメニューから選んで起動できるようになっていてとても使い易いです.また,Headless でインストールできるというのも好印象です.
あまり日本語のページが見つからないのが少しハードルが高く感じる人も多いと思いますが,慣れればとても使い易いディストリビューションです.
以上!